 Selective colour is one of those little Photoshop tricks that’s well worth keeping up your sleeve. The effect is hardly new, cutting edge or revolutionary, but it can still make an eye catching image providing it’s used sparingly.
The basic idea is simple enough. First find a standard colour image that contains a bold area of a single colour. That done you’ll need to select the colour and turn everything else black and white. OK, that sounds easy enough doesn’t it, but how do you select just one colour from an image?
Take a look at the image opposite to get an idea of the direction I’m headed. So let’s begin.
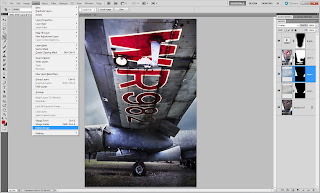 Step One
First open your image, apply any processing you wish and if your image has multiple layers save a copy and then click Layer - Flatten Image to collapse all the layers down into a single background layer.
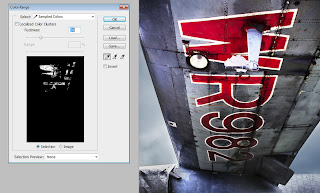 Step Two
Click Select - Color Range to open the color range selection tools. If you’ve never used this tool before don’t worry it’s all nice and straight forward. Moving your cursor over the image will turn it into a colour sampler tool. Click on the colour you’d like to select, in this case red lettering, and have a look at the result on the Color Range window. White shows the selected areas and black shows unselected areas of the image.
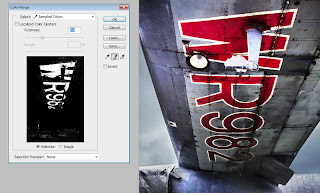 Step three
Either increase the fuzziness to enlarge the range of similar colours sampled or click on the Add to Sample eyedropper and click on more areas of similar colour. Continue until the area of colour you want to select has turned white in the preview window and the majority of the remaining image is black. Remember CTRL+Z will undo your last click… handy to know if you accidentally sample in the wrong spot.
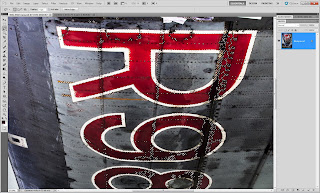 Step Four
Now this is the bit that seems wrong, but trust me it’s important. Click Select - Inverse.
The chances are there will be areas selected that are the same colour as the thing you wanted to selected, but are not part of it. Remove these using any selection tool you like (free hand lasso is a good choice). Remember to hold Shift as you draw your selection.
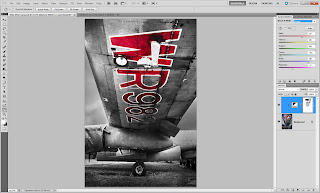 Step five
Click Layer - New Adjustment layer - Black & White and the colour will disappear from the image except the area you selected. The back and white areas can be adjusted by moving the sliders on the Black & White adjustment layer to create a mono look that compliments the image.
So there you have it, selective colour in five easy steps.

6 comments:
Thanks Gavin, yet another great tutorial!
Another Great tip Gavin. Can't wait to try it.
Ken :0)
WOW! Great tutorial!
Thanks!
Merci! Gavin.
Video please!
Brilliant...so quick. x
Post a Comment