Wednesday, 24 February 2010

Portrait Photography using continuous lighting - video

Although I'm really a flash based studio photographer, a recent video commission gave me the chance to try out some high powered continuous lighting for studio portraits. I use similar lights for my video work, but I've never really thought of them as being bright enough of still photography.

To be honest the first few shots didn't really looked poor and I nearly didn't bother doing the video. Put simply the images were very soft, verging on them being blurred. The softness was caused by a combination of slow shutter speeds and the wide apertures I needed to use with the lights. But I'm not one for falling at the first hurdle so I turned up the camera's ISO and instantly solved the problems. In fact the results were surprisingly good as you'll see towards the end of the video.

If you have no interest in continuous lighting but do want some general lighting tips and techniques, feel free to jump past the first three minutes of the video.

The lighting set up I show in the video is often called beauty lighting and consists of a main light above the model and fill light (or reflector) below the model and a hair light behind the model. It's a very simple and effective lighting set up that I use a lot in the studio.


Disclaimer: the video above was commissioned by www.smick.co.uk and other companies produce similar products.

So am I going to ditch flash and move to continuous lights? No. The pictures were good and the results were predictable (what you see is what you get) but all that light was a bit to blinding for the model.

Windows 7 and RAW images

Regular blog readers will know that due to unforeseen circumstances I recently found myself without my main PC. If you missed what happened, jump back a few posts. In the end I decided to replace rather then repair and jumped on the Windows 7 band wagon with a shiny new PC.

Like Vista (and XP) Windows 7 comes in both 32bit and 64bit version. But unlike Vista (and XP) the 64bit version of Windows 7 is well supported by software and hardware companies. The upshot was, all my hardware worked without a problem and almost all of my software reinstalled without complaining.

I say almost, because there were one or two problems which needed an extra download from the internet, but nothing to worry about.

However, I hit a major hurdle when it came to RAW files. I like to use Windows to view thumbnails of my images and in Windows 7 I could see JPG’s but not RAW thumbnails. Yes I could’ve use Bridge, but Windows is always there and really easy to use.

Previously I’ve blogged about installing RAW codecs from both Canon and Nikon to view enable RAW thumbnails viewing in Windows, so I downloaded the latest versions and rebooted the PC. Nothing happened. So I tried again, but still I couldn’t see the thumbnails.

It turns out both Canon and Nikons RAW codecs are for 32 bit operation systems only. How frustrating!

A search on Google pointed me to a tiny little program called “Fast Picture Viewer” which claims to provide a free RAW codec for almost all camera models. I have to admit I didn’t believe that it would work, especially as it was a 3mb in size compared to Canons 60mb file. But needs must, so I gave it a try.

Wham! As soon as I installed the software it worked. Amazing!

Now all I need is a PSD file viewer for Windows 7 64 bit and I’ll be a very happy bunny.

Sunday, 21 February 2010

7 Theatre photography tips.

Photography is all about light. So how do you cope when you’re asked to photograph in almost total darkness, when you have to freeze moving subjects, where flash is banned and you've only get one chance to bag the best photos? Welcome to the world of theatre photography.

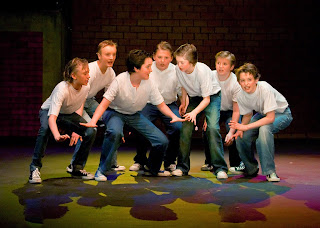
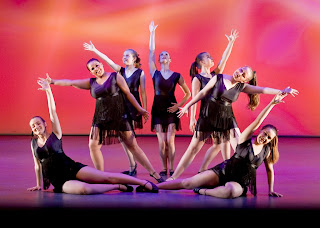
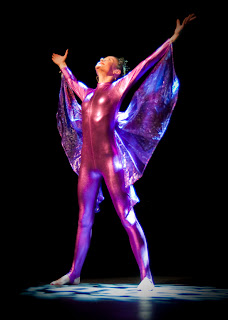
I’ve been lucky enough to be the official photographer on many drama and dance productions. Over the past few years I’ve learned the hard way exactly what works and what doesn’t. So here are my top seven theatre photography tips.

1) Preparation

Before you leave home you need to be prepared for the task ahead. First there’s the obvious stuff. Pack lots of empty memory cards, a couple of extra batteries and a back up camera, just in case. The next thing to get ready is you. Wearing black will help to blend into the shadows, comfortable and quiet shoes are also a must. Finally pack food and drink; you may be in for a long day.

2) Theatre etiquette
Weeks or months of rehersals and planning will have been put into the preparation for the show, so be under no illusion that you, as a photographer, are not going to get any special attention. In fact you might well be the cause of problems. So, find the director or stage manager and introduce yourself. Ask about the “house rules” e.g. can you move around during the performance? If you can, always photograph the dress rehearsal (know as a technical rehearsal) rather then the actual performance.


3) Flash or no flash.
The light levels are going to be very low, so it's very tempting to use flash. But the golden rule is, during the performance, absolutely no flash… ever!

Two reasons for that. One, it’s very off putting to the actors and two, you’ll end up with really horrible pictures. The lighting crew have spent time and money creating atmosphere with their lights and it’s your job to capture that atmosphere.

4) Lens choice
Fast glass is the name of the game. Fast glass is lenses that have a wide aperture. f4 is OK but f2.8 is better. Image stabilising lenses can help with camera shake, but motion blur is the biggest problem. When you get shutter speeds of 1/100th second or below you can expect to get motion blur on the hands and feet of the actors. Predicting when the actors are going to move is a skill you'll learn very quickly.

5) Camera settings
I always shoot in Aperture Priority mode and open the aperture as wide as possible. I’ll keep an eye on the shutter speed and will stop down whenever I get the chance. ISO is often on max (1600 iso on my Canons) and I record in RAW of course. Theatre lighting can be a mixed bag, so RAW allows me to correct the white balance back home.

6) Shooting position.
I always shoot with two or three cameras. The first camera is set on a tripod in the centre of the theatre just higher then the stage and is opperated by my assistant, Sam. She takes small group shots, whilst I move around close to the stage to take the close ups. I also have a third camera fitted with a wide angle lens to cover the whole stage. This is connected to a time-lapse trigger and takes a picture every 15 seconds. You can see the results below
.


7) And finally…
Over shoot. Expect one in five shots to be sharp and perhaps only half of those to be good photographs. You may well do better then that, but it’s far better to have two many pictures then to few.

Have a "comfort break" before you start. Dress rehearsals can go on and on and you don’t want to be nipping off to the loo half way through!

Back up your images as soon as possible, the unthinkable can strike at any time!

Lastly, have fun. Theatre photography is fantastic fun and a real challenge to even the most seasoned professional. Embrace that challenge and you’ll come away with some amazing images.

Don't look down!

You get to go to some pretty strange places in the name of photography and today is no exception.

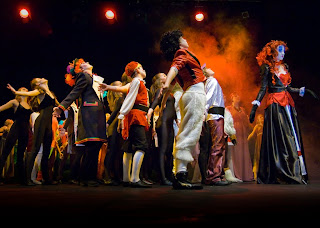
A local junior amature dramatics society has put on a production of "Alice in Wonderland" and once again, I'm the official photographer. I've been lucky enough to photograph a number of theatre productions over the past few years, several of which have been in the same theatre. That's given me the opportunity to get to know many of the hard working backroom boys (and girls) and it was that connection that got me a very unusual invite.

If you've ever been to a theatre and looked up at the lights you may have spotted the lighting gallery. It's a small walkway which gives access to the lights and is where the spotlight operators sit and work during the performance. For one performance only it was permitted to use it as a photo platform.


As you can see from this wide shot (taken just for this post), it's a good job I don't have a fear of heights! That said I was really aware of making sure I didn't drop anything. I took off the lens hood (just in case), I strapped my camera bag to a railing. I even wore my camera strap round my neck and that's something I NEVER ever do normally.

The initial results look great. The elevated position really shows off the lighting effects and will compliment the more traditionally shot (stage height) photos I took during the dress rehearsal.

In the next post I'll share with you a few more images and give you some top theatre photography tips.


Monday, 15 February 2010

The lesson of the past 10 days is….

The blog has been strangely quiet over the past 10 days or so. Thank you to everyone who got in contact to make sure I’m OK. You’ll be pleased to hear I’m fine and no I’ve not been off on some exotic holiday or struck down with a terrible illness.

No, the lack of posting has been caused by the utter chaos caused by the sudden and unexpected failure of my PC’s main hard drive.

Now I know what you’re thinking. A professional photographer like Gavin would have everything backed up just in case. Well you’re right, I have every wedding, studio shoot, training article and video I’ve every made safely backed up, but there’s a lot more on my PC then just photos.

Emails, correspondence, passwords, stationary, work in progress, internet favourites and mp3’s are just some of the day to day items that I never thought of backing up. Replacing them is taking forever!

So what is the lesson of the past 10 days?

B A C K U P !

Normal blogging will resume later this week.

Gavin.

Friday, 5 February 2010

360 panoramas in Photoshop?

In the last post I talked about how amazingly quick and simple it is to make a panoramic inside of Photoshop. Photomerge has become increasing clever at seamlessly joining overlapping images together, but it does have it's limitations.

First off, if you're using Photoshop CS3 you're limited to a panoramic that covers a field of view that's roughly 180 degrees. That's pretty wide, but Photoshop CS4 can manage an eye spinning 360 degrees.

There's other differences too. For example Photoshop CS4 can join a multi row panorama and even a vertical pano. Photoshop CS3 can't do either of those, although a quick cheat for vertical panos is to rotate the images and trick Photoshop into thinking it's a horizontal image. Just remember to rote the final image back to vertical.

The other major difference between Photomerge in CS3 and CS4 is how wide a lens you can use. I found CS3 was OK with lenses going down to 24mm (on a APS-C camera) but struggled with anything wider. In Photoshop CS4 we have a Geometric Distortion Correction option which allows the use of super wide optics and even fish eye lenses.

So in theory Photoshop CS4 is capable of stitching a full (spherical) 360 degree panoramic. But does it work?

Actually, no. Well ok it does work, but when it comes to full panoramics shot with a 10mm wide angle lens, it's far from perfect.

Have a look at this panoramic I shot today. It's a full 360 pano, so that's everything I could see in front, behind, above and below. 17 images were needed to complete the image.

Click to enlarge

Look closely. Can you see the joins? I'm pretty sure you won't find any. Mind you I didn't use Photoshop, I used Autodesk Stitcher, a purpose built panoramic stitching program.

The location is stunningly peaceful Worth Abbey in Sussex, England and I was lucky enough to be allowed in to take a number of interactive panoramics. Why are they interactive? Well download my virtual reality tour (4mb) to see. Just drag your mouse over the Quicktime "movie" to see exactly what I saw. including the top of my tripod!

Here's the link: http://www.gavtrain.com/free/worth-abbey-VRtour.mov

By the way, vrtual tour images is just one of the services offered as part of my Photography Services. See http://www.gavinphoto.co.uk/

.

Tuesday, 2 February 2010

Preaching to the converted

Wow, doesn’t time rocket past when you’re busy and last week was one of those times. I get to many enjoyable things as a photographer and sometimes I have to remind myself that I’m actually at work. One of the things I enjoy is giving talks to camera clubs and photographic societies all over the UK.

My diary for camera club talks is booking well into 2011, which is great. Usually I try to keep the talks down to a few each month, but last week I presented three lectures in seven days.

Until now, all my talks have been based around Photoshop tutorials. Don’t get me wrong, I really enjoy teaching Photoshop and they’ve always been hugely popular. But to keep things fresh and exciting for the audience (and for me) I’ve been looking for ways to spice things up a little.

So recently I’ve introduced some live photography to each lecture. The plan is to have some sort of “shoot it, Photoshop it” talk ready for 2011, but because live photography is something of a rarity in UK camera clubs I thought I’d better test drive the theory first.

But what do you photograph at night in front of an audience made up of other photographers? After a bit of head scratching I figured out that the simplest and most interesting thing I could photograph was the audience.

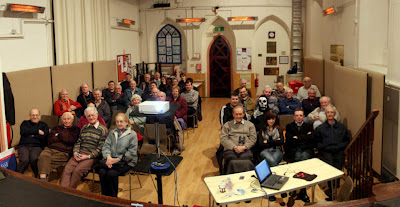
What you see in the picture above is a panoramic image of the members of Horley Camera Club. It's made up of four images stiched together.

How to take a pano
If you’ve never taken a pano before, the technique couldn't be simpler. The first thing to check is your software. If you’re using Photoshop CS4 or CS3 then you’re in luck as it features the newest version of Photomerge. Similarly, users of Elements 6, 7 & 8 are equally blessed with the panoramic stitching power of Photomerge, although it has a few less features.

The next thing to do is take a series of images. For these shots I used my Canon 24-105L lens at its 24mm setting. I cranked up the ISO to 1600 to avoid the use of flash and overlap each image by roughly 30% to ensure a good stitch.

How to stitch a pano
Open all the Images in Photoshop and click File – Automate – Photomerge (Elements users click File – New – Photomerge Panorama)


Use the Auto setting and click the Add Open Files button. Click OK and wait for a few minutes as Photomerge does it’s thing.


It’s that simple.


One quick tip. If you’re pano gets the bow tie effect, meaning it’s stretched out at the corners, restitch it with Geometric Distortion Correction turned on (not available in Elements).

Here’s a the pano’s from the other two clubs.

Gravesend
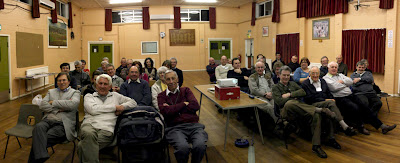


West Malling

One final tip. If you’re coming to one of my talks, dress smart, sit up and smile!

.