Monday, 28 December 2009
Bath Abbey - 15 Minute Photo Challenge
Thursday, 24 December 2009
Coming soon... Bath Abbey
The plan for 2010 is to record a lot more live action photography tutorials and that will include more 15 minute photo challenges as well. I hope to run these along side the Photoshop tutorials that I'm known for. At the moment I'm on the hunt for more great photo locations, so if you have any suggestions, contacts or advice I'm all ears.
Last week my family battled our way through the snowy weather for a short break in the roman city of Bath. I've been there before and knew it would make a great spot for a 15 minute Photo challenge. The weather was freezing cold, so I needed the challenge to make me go out and take some photos and I'm really pleased that I did.
15 minutes it's long when your brain is focused on finding photos, so I stuck to the tourist area around Bath Abbey. That worked out well and provided loads of great photos. I was really hoping to record a second 15 minute photo challenge inside the Abbey, but sadly the Abbey was closed. Next time I'll plan ahead...
If you want to visit Bath Abbey have a look at their website which also has the opening times.
Whilst I'm busy editing the video footage I thought you might like a sneak preview of some of the photos that resulted from the challenge. As always, these are the actual images taken during the filming and no more the 60 minutes was spent in Photoshop making any adjustments.
In total there are around 20 good pictures, here are my favourite 6.
Click the images to enlarge.
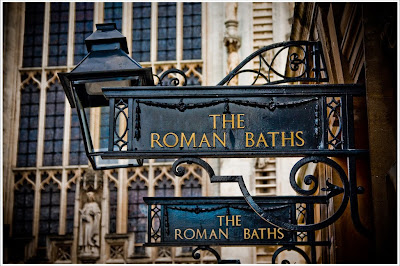
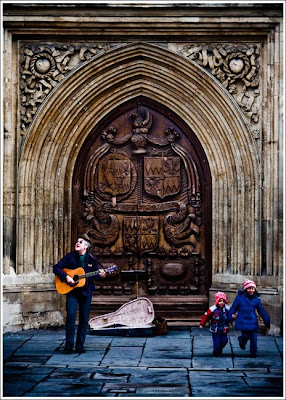
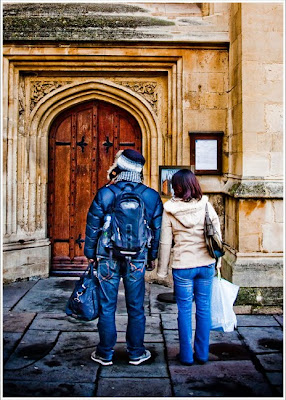
Friday, 18 December 2009
Kinetic Photography
A great example of the ebb and flow in photography is black and white prints. In my early days "real" photographers had a darkroom and no one made colour prints. OK, there were a few people, me included, who did colour printing, but colour prints were the reserve of amateurs.
Of course the reality was that colour printing was far more complicated and expensive then black and white, so when easy digital inkjet prints came along everyone jumped to colour. A few years passed and suddenly colour prints were boring, ordinary and mundane. Suddenly black and white prints looked different, new and creative.
It's a funny old world.
So what has all that got to do with kinetic photography? Well, kinetic photography has never been, and probably never will hit the mainstream and that makes an interesting area to explore without fear that the results will look old and tired in a few years time.

But there's a twist. At the moment the image was taken the camera was moving through the air. Yes you read that right, the camera wasn't being held by me or a tripod, but falling to the ground.
No I can be mad, but I'm not stupid and the camera survived without a scratch. So here's how it's done.
The image is a photo of my TV which wasn't tuned to a channel. The camera (a Pentax Optio A20) was set to self timer and as the count down reached 1 second I tossed the camera a few inches in the air. It landed on a large beanbag safe and sound.
As a disclaimer, don't try this with a camera you really love. It could easily go wrong and result in a broken camera.
If you want to see more kinetic photography images there's a great group on Flickr. Here's the link.
Wednesday, 16 December 2009
Your text is on fire - video tutorial
Burning text effects are big news in the media and advertising worlds. You're probably seen the effect before and wondered how it's done. Well it's not to difficult but only if you have some decent images to work with.
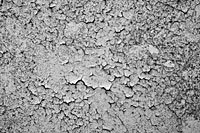
Let's start with the texture. From the 100's of textures I've got of file, very few gave the right effect. So exclusively for the readers of my blog here is my texture image as used in the tutorial.
Click the image to open the full sized version.
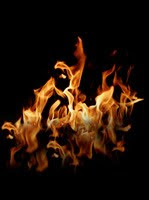
The second image is a touch more tricky. First, don't try photographing this at home kids, you might end up with burn or worst a burnt camera!!!
Of course there are ways of faking fire in photoshop, but you just can't beat a proper fire photo.
Once again, click the image for the full sized version.
As always, your free to use the images for personal use, but don't pass them on and sorry, no commercial use without written permission. Enjoy.
By the way this video was made for a photoshop competition run by the NAPP entitled "So you think you can teach Photoshop". Unfortunately I didn't win, in fact I didn't even get a runners up spot. So, if you would like to watch some videos from people who apparently can teach Photoshop have a look at some of the other videos entried.
Sunday, 13 December 2009
3 for 2 offers
Tuesday, 1 December 2009
Continuous vs Flash, which lights are best.
The first two have always seemed to be a very personal choice. There are lots of excellent brands around. I use Elinchrom in my studio and have been very happy with the results, but a good friend of mine swears his Bowens lights are superior. One thing we both agree on is the need for at least two (or better still four) lights as a minimum.
The last point has always been a "no brainer". For me flash has always beaten continuous lighting for three reasons.
1 Flash is far brighter then continuous lighting.
2 Flash doesn't make a models pupils go really small.
3 Flash is far less hot for the model.
But recently I had a chance to try some of the modern alternatives to traditional tungsten continuous lights. They’re based on low energy fluorescent bulbs and the results really surprised me. Let’s look at those three points again.
1 Flash is far brighter then continuous lighting.
Well this is still true. I used a twin continuous light kit which punched out 1000w of light each. Even with the lights very close to the subject and using a nice wide aperture, I was getting shutter speeds of 1/60th sec at ISO100.
2 Flash doesn't make a models pupils go really small.
No change here. Not surprisingly 2000w of light in your face will always cause your pupils to shirk right down..
3 Flash is far less hot for the model.
Not with the modern fluorescent bulbs. These things produce more light then heat. Yes they get warm, but no more then the modelling lamps on my flash heads. Plus they're daylight colour balanced, so no strange colour problems.
Another thing to consider is the size of these modern fluorescent bulbs. They range from big to huge. To give you some idea, have a look at this image.

To give you a guide, the 20w bulb is from my office light and pushes out the equivalent of 100w. The 50w bulb produces the equivalent of 250w and the massive 105w bulb punches out just over 500w of light. Wow!
So, on to the big questions.
Would I still recommend flash over continuous? Yes (see below for exceptions), flash still wins in my opinion. Whilst the new bread of continuous lights are a vast improvement over the hot tungsten lights of my youth, they still have some issues to resolve.
Why did I buy continuous lights? In a word, video. I'm spending more time producing video content for a number of different companies and I need some better lights. So, if like me, you’re thinking about combining video and stills photography continuous lighting make total sense.
Will I be using continuous for still photography? Yes. Despite all I've said there's still one big advantage to continuous lights. What you see is what you get. So for product photography where shutter speed isn't an issue, they're amazingly good. I'm also planning to try them in my next photo session when I want to very shallow depth of field. I’ll let you know the results.
For more details on continuous lights check out http://www.fjwestcott.com/ (North Amarica) or http://www.smick.co.uk/ (UK)


