Monday 28 December 2009

Bath Abbey - 15 Minute Photo Challenge

As promised here is the 15 minute photo challenge recorded around Bath Abbey. But as a special thank you to my blog readers this video is an extended version of the one on my YouTube channel.


If you'd like a clear look at many of the photos in the video, then my Flickr page is the place to go. Here's the link http://www.flickr.com/photos/photogavin
.

Thursday 24 December 2009

Coming soon... Bath Abbey

I'm getting a lot of positive feedback about the 15 minute photo challenges and many emails and messages asking for more. That's great news for me, because I really enjoy making them and the results are often some of my favourite photos.

The plan for 2010 is to record a lot more live action photography tutorials and that will include more 15 minute photo challenges as well. I hope to run these along side the Photoshop tutorials that I'm known for. At the moment I'm on the hunt for more great photo locations, so if you have any suggestions, contacts or advice I'm all ears.

Last week my family battled our way through the snowy weather for a short break in the roman city of Bath. I've been there before and knew it would make a great spot for a 15 minute Photo challenge. The weather was freezing cold, so I needed the challenge to make me go out and take some photos and I'm really pleased that I did.

15 minutes it's long when your brain is focused on finding photos, so I stuck to the tourist area around Bath Abbey. That worked out well and provided loads of great photos. I was really hoping to record a second 15 minute photo challenge inside the Abbey, but sadly the Abbey was closed. Next time I'll plan ahead...

If you want to visit Bath Abbey have a look at their website which also has the opening times.

Whilst I'm busy editing the video footage I thought you might like a sneak preview of some of the photos that resulted from the challenge. As always, these are the actual images taken during the filming and no more the 60 minutes was spent in Photoshop making any adjustments.

In total there are around 20 good pictures, here are my favourite 6.

Click the images to enlarge.


Friday 18 December 2009

Kinetic Photography

Photography is like fashion, some styles and techniques rise in popularity whilst previously popular techniques fade into the past. I've seen happen time and again over the 20 years or so I've been an active photographer.

A great example of the ebb and flow in photography is black and white prints. In my early days "real" photographers had a darkroom and no one made colour prints. OK, there were a few people, me included, who did colour printing, but colour prints were the reserve of amateurs.

Of course the reality was that colour printing was far more complicated and expensive then black and white, so when easy digital inkjet prints came along everyone jumped to colour. A few years passed and suddenly colour prints were boring, ordinary and mundane. Suddenly black and white prints looked different, new and creative.

It's a funny old world.

So what has all that got to do with kinetic photography? Well, kinetic photography has never been, and probably never will hit the mainstream and that makes an interesting area to explore without fear that the results will look old and tired in a few years time.


So what is it? It's abstract art taken with your camera. It's more Tate Modern then The National Gallery and I'd love to make it into a large canvas print form my office wall.

But there's a twist. At the moment the image was taken the camera was moving through the air. Yes you read that right, the camera wasn't being held by me or a tripod, but falling to the ground.

No I can be mad, but I'm not stupid and the camera survived without a scratch. So here's how it's done.

The image is a photo of my TV which wasn't tuned to a channel. The camera (a Pentax Optio A20) was set to self timer and as the count down reached 1 second I tossed the camera a few inches in the air. It landed on a large beanbag safe and sound.

As a disclaimer, don't try this with a camera you really love. It could easily go wrong and result in a broken camera.

If you want to see more kinetic photography images there's a great group on Flickr. Here's the link.

Wednesday 16 December 2009

Your text is on fire - video tutorial

Burning text effects are big news in the media and advertising worlds. You're probably seen the effect before and wondered how it's done. Well it's not to difficult but only if you have some decent images to work with.


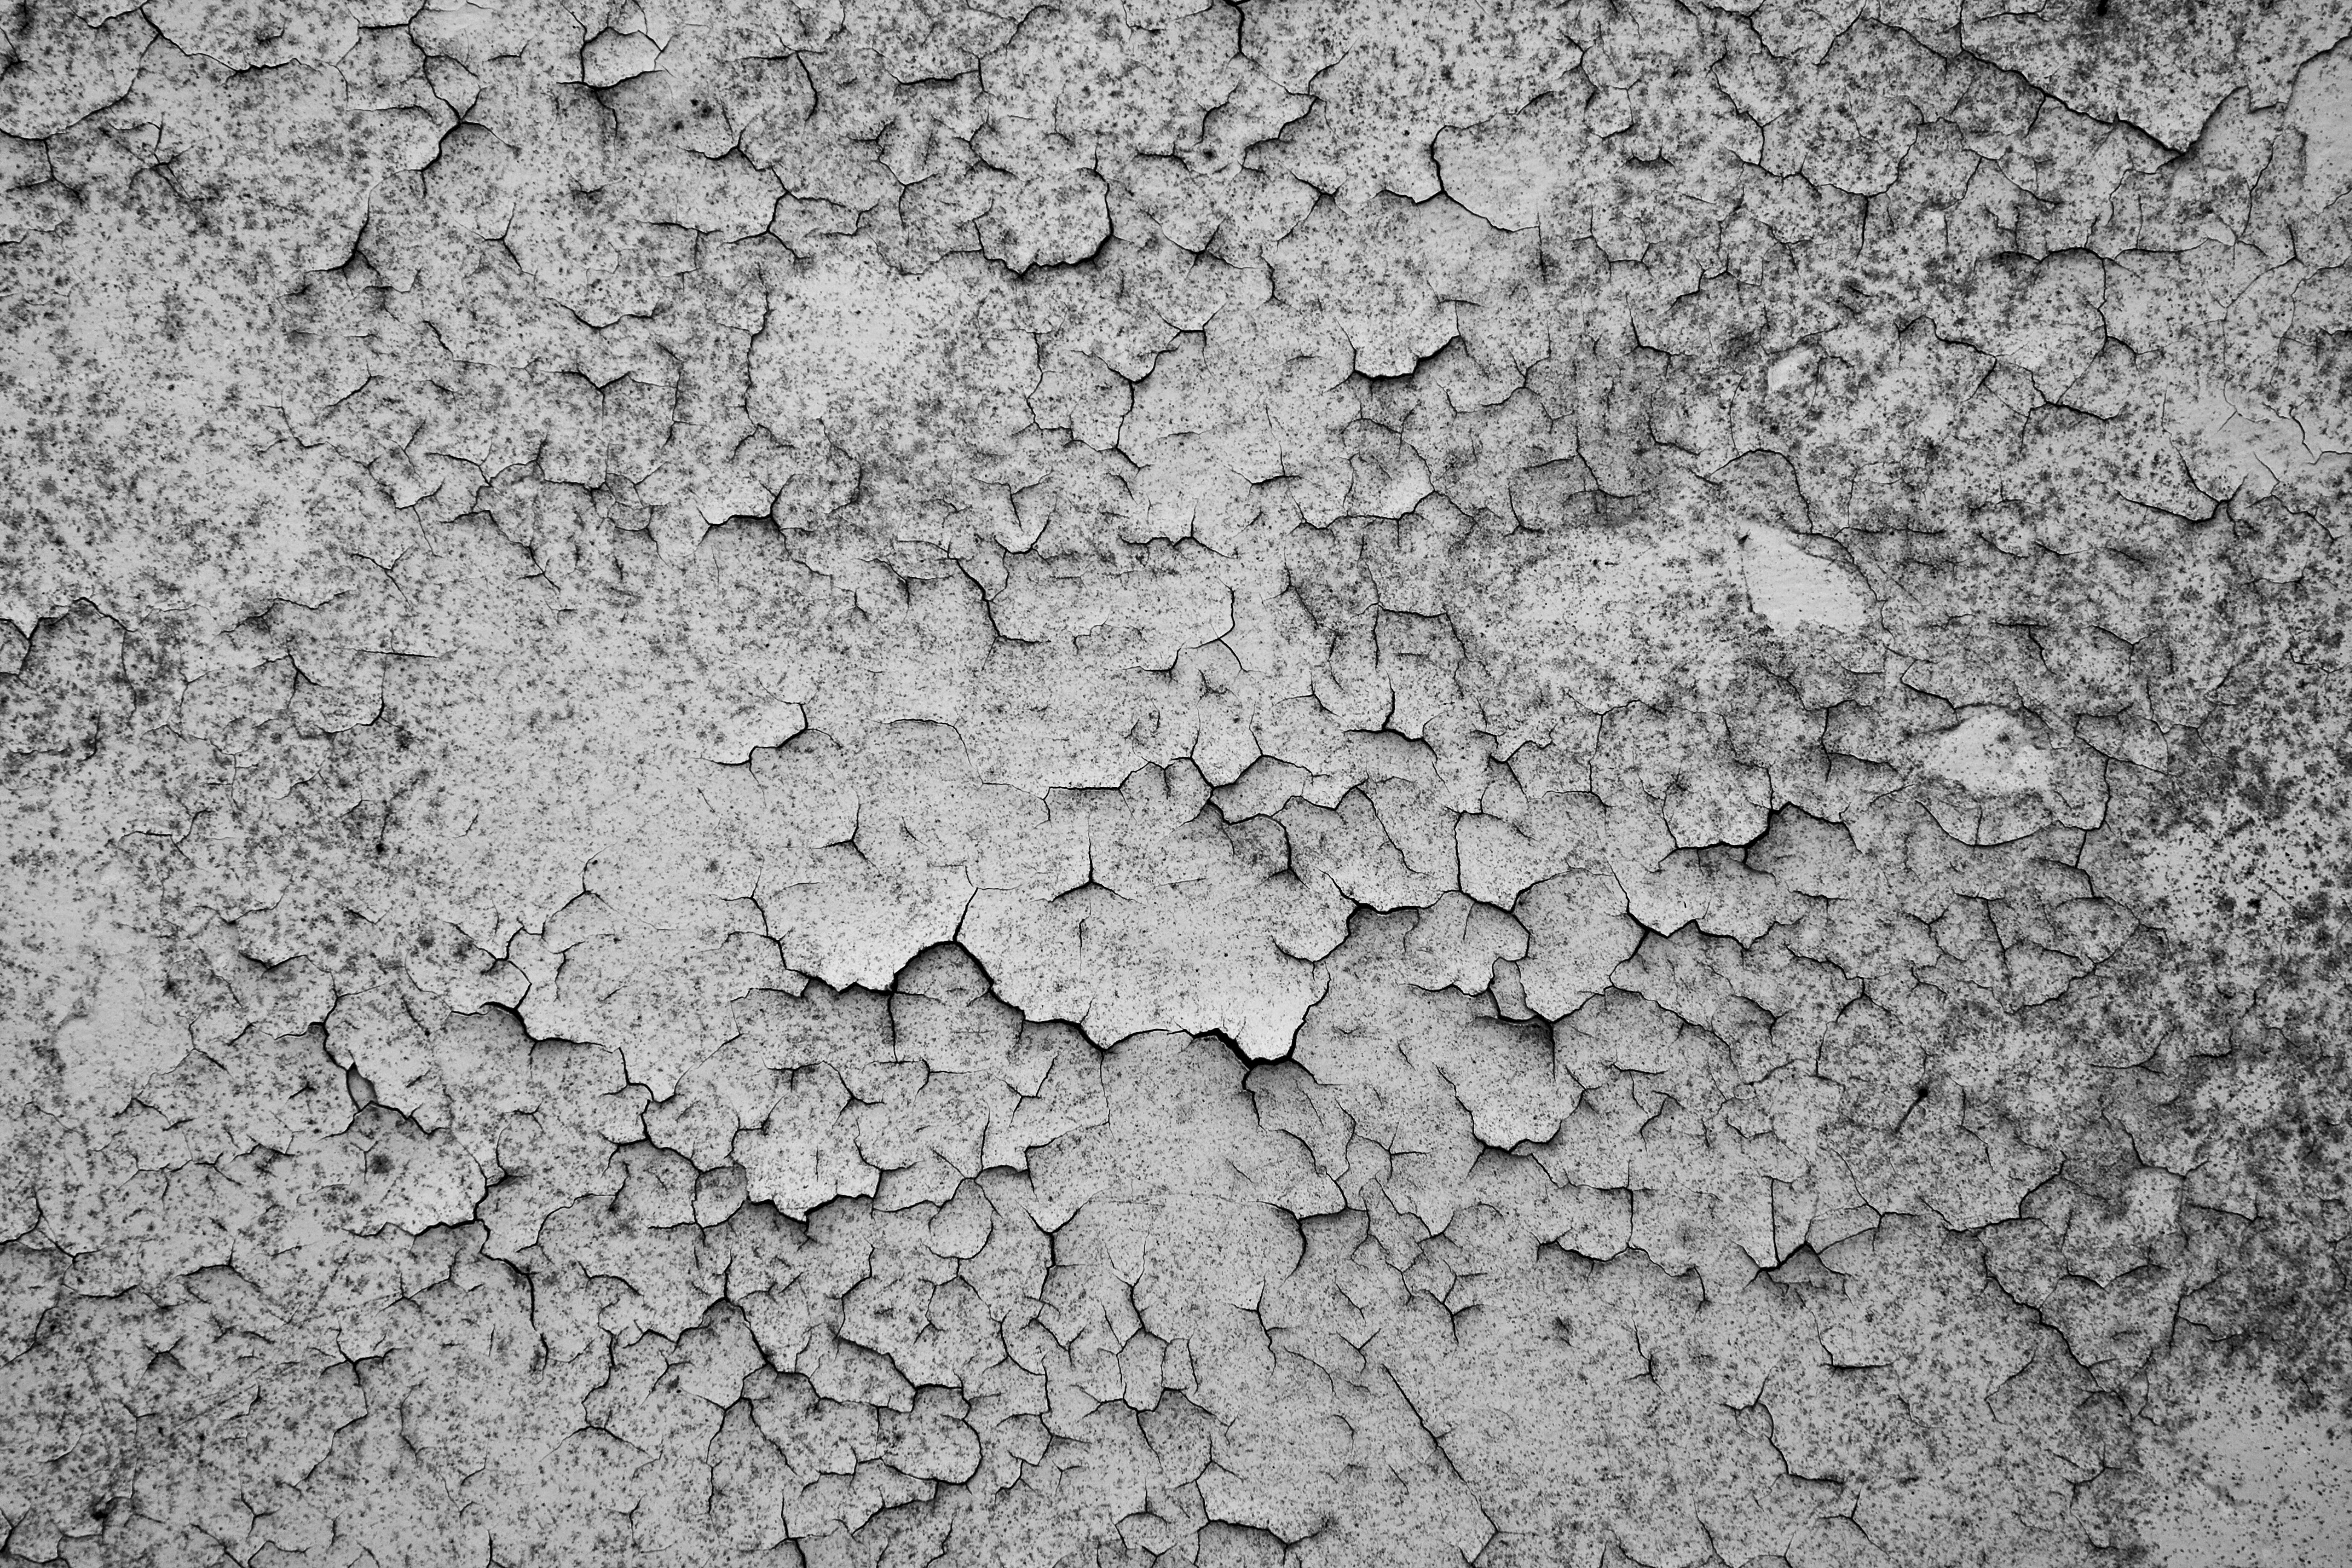
Let's start with the texture. From the 100's of textures I've got of file, very few gave the right effect. So exclusively for the readers of my blog here is my texture image as used in the tutorial.

Click the image to open the full sized version.


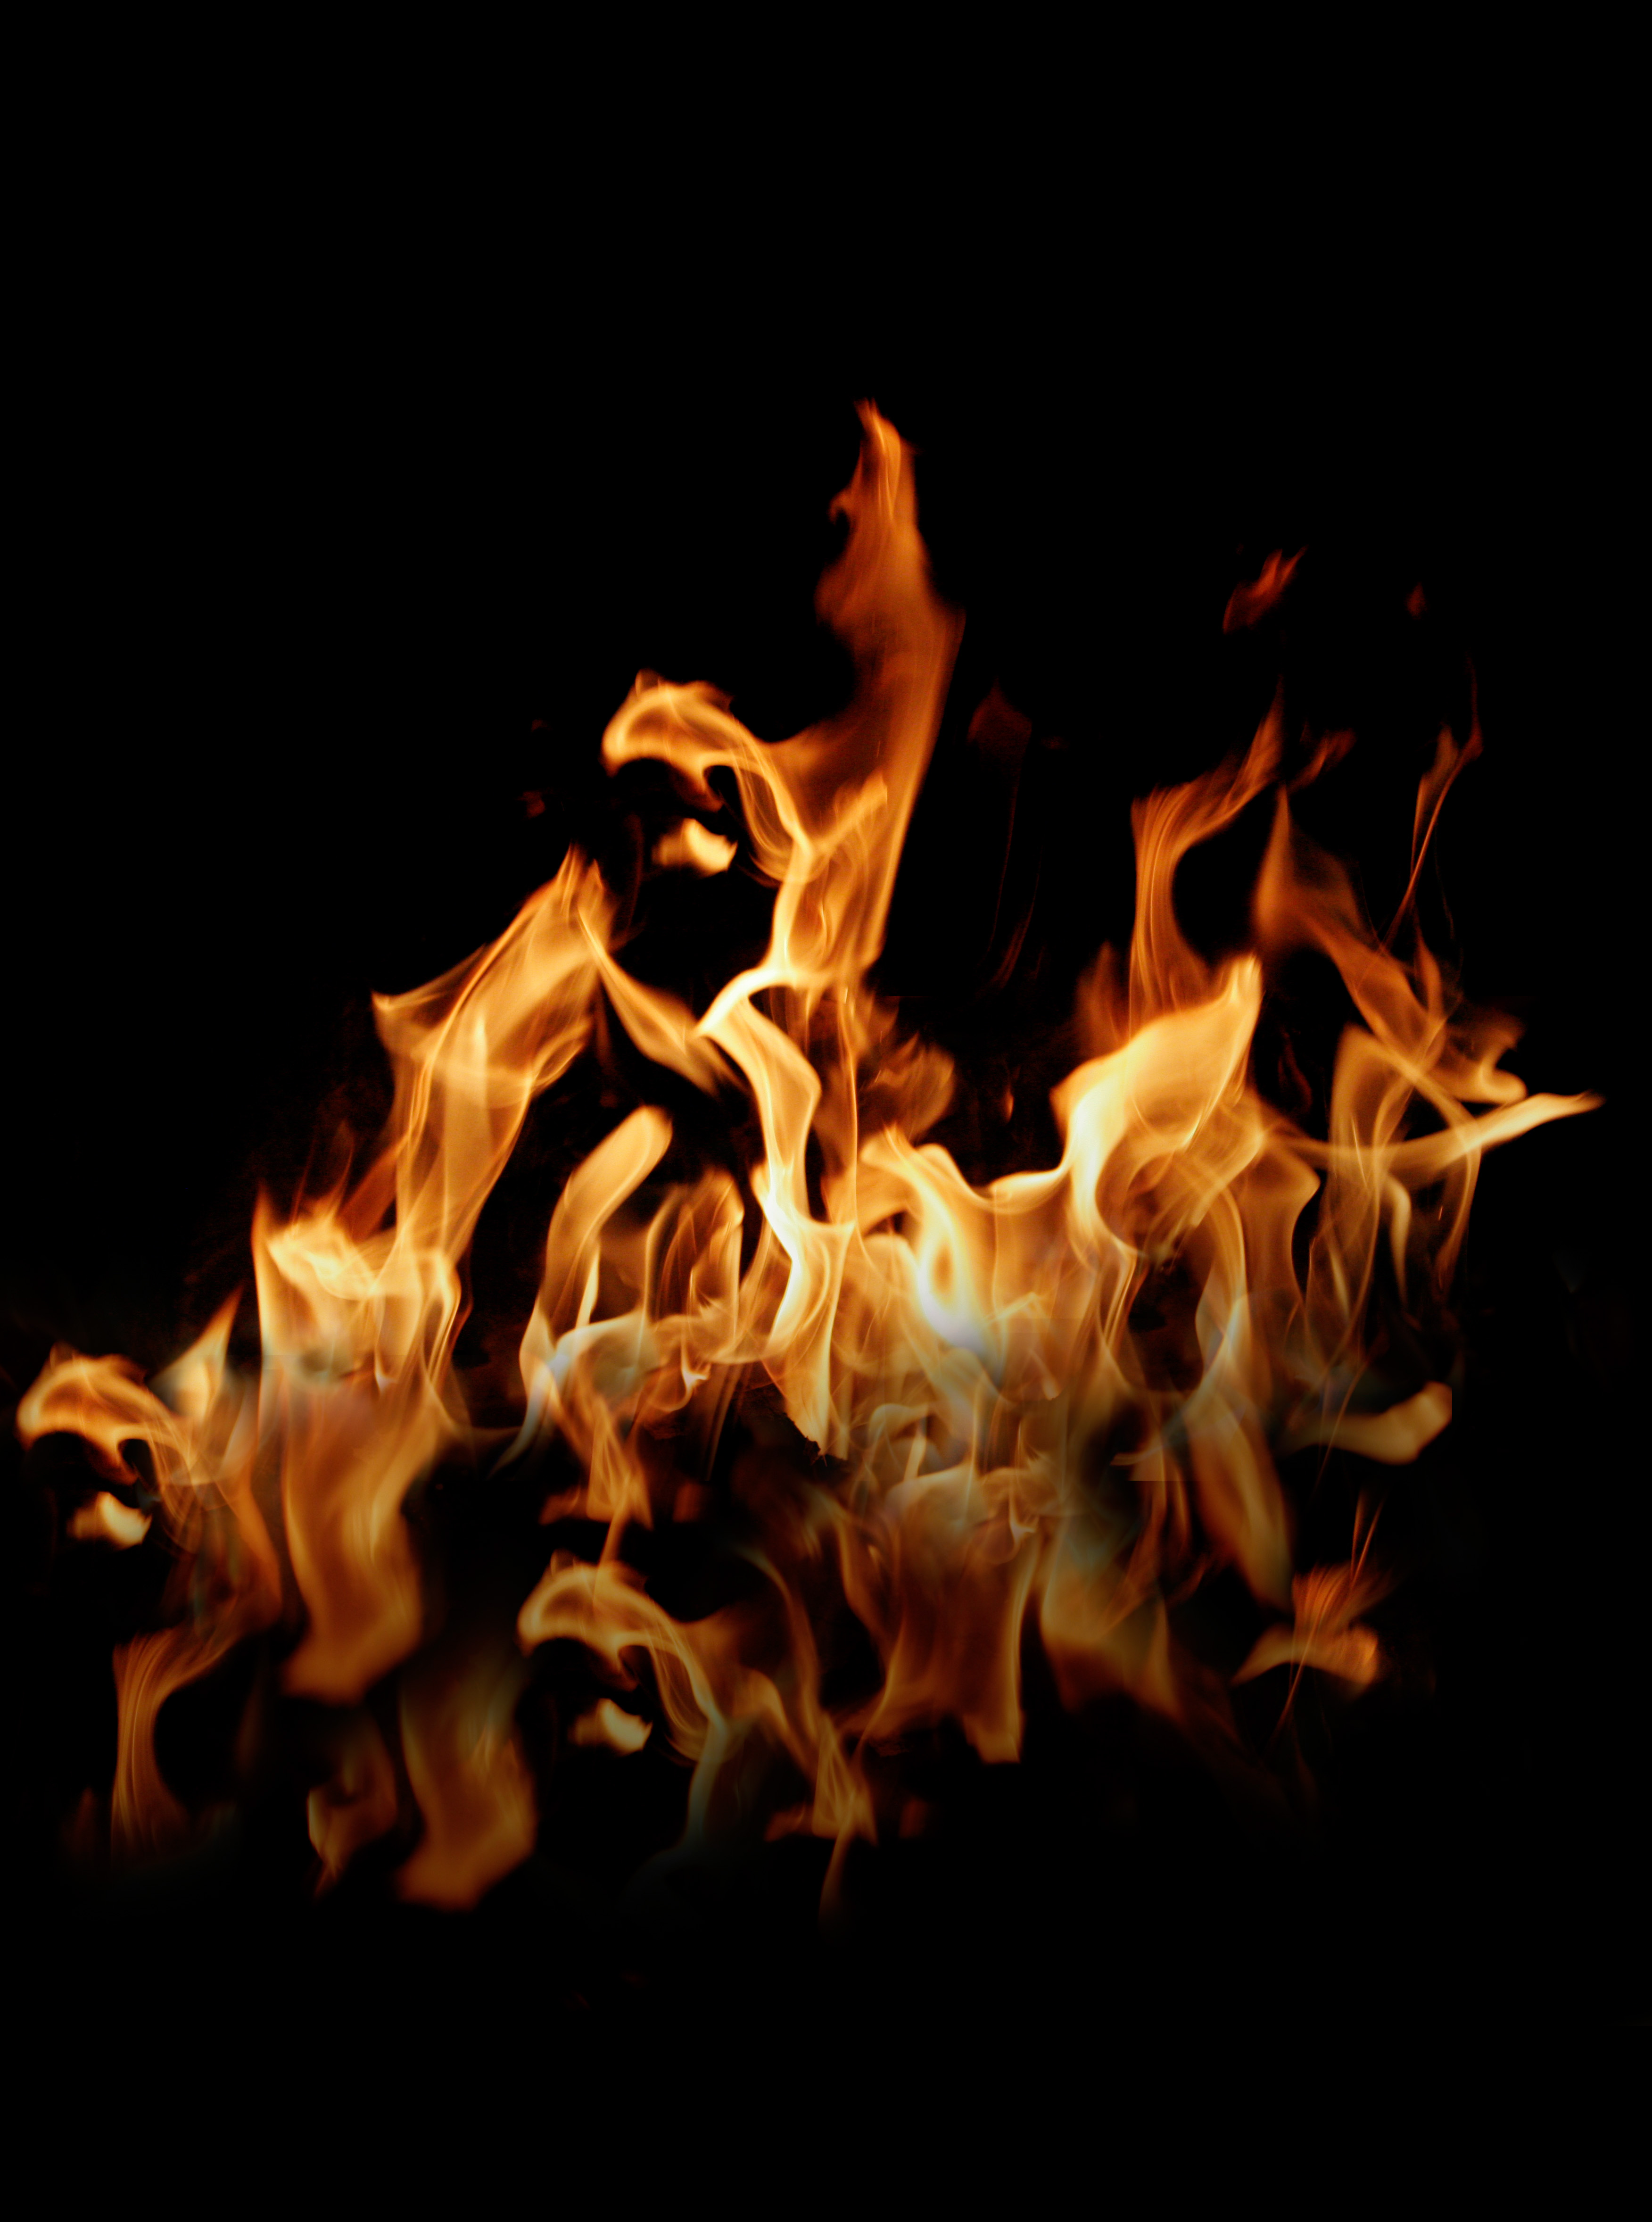
The second image is a touch more tricky. First, don't try photographing this at home kids, you might end up with burn or worst a burnt camera!!!

Of course there are ways of faking fire in photoshop, but you just can't beat a proper fire photo.

Once again, click the image for the full sized version.

As always, your free to use the images for personal use, but don't pass them on and sorry, no commercial use without written permission. Enjoy.

By the way this video was made for a photoshop competition run by the NAPP entitled "So you think you can teach Photoshop". Unfortunately I didn't win, in fact I didn't even get a runners up spot. So, if you would like to watch some videos from people who apparently can teach Photoshop have a look at some of the other videos entried.

Sunday 13 December 2009

3 for 2 offers

The past week has been a really busy one and that has stopped me blogging. Sorry. My website www.gavtrain.com has finally been completely reworked and now sports a very neat shopping cart. Hopefully you won't be able to spot the changes as it all happened behind the scenes.

The new cart has a number of improvements over the old system, including the ability to buy with a credit card (including American Express), which means you no longer have to sign up to PayPal or Google to buy from me. Best of all, it's now possible to order multiple Training DVD's in a single transaction, a feature that lots of my customers have been waiting for.

To really give the new site a work out, I'm running a special offer. When you buy Totally RAW and Photoshop Layers you'll get The Best of YouTube vol.2 absolutely FREE. That's more the five hours of Photoshop tutorials!
Here's a link to the special offer page

If you're looking for a Christmas gift for a photographer then these might just be the answer to your dreams. But remember the last day for UK orders on "standard deliver" is this Thursday (17th December).
.

Tuesday 1 December 2009

Continuous vs Flash, which lights are best.

When it comes to choosing studio lighting there are many choices open to a photographer. Let's kick off with the obvious things, like which manufacturer do you choose, how many lights will you need and finally, should you buy flash or continuous lighting?

The first two have always seemed to be a very personal choice. There are lots of excellent brands around. I use Elinchrom in my studio and have been very happy with the results, but a good friend of mine swears his Bowens lights are superior. One thing we both agree on is the need for at least two (or better still four) lights as a minimum.

The last point has always been a "no brainer". For me flash has always beaten continuous lighting for three reasons.
1 Flash is far brighter then continuous lighting.
2 Flash doesn't make a models pupils go really small.
3 Flash is far less hot for the model.

But recently I had a chance to try some of the modern alternatives to traditional tungsten continuous lights. They’re based on low energy fluorescent bulbs and the results really surprised me. Let’s look at those three points again.

1 Flash is far brighter then continuous lighting.
Well this is still true. I used a twin continuous light kit which punched out 1000w of light each. Even with the lights very close to the subject and using a nice wide aperture, I was getting shutter speeds of 1/60th sec at ISO100.

2 Flash doesn't make a models pupils go really small.
No change here. Not surprisingly 2000w of light in your face will always cause your pupils to shirk right down..

3 Flash is far less hot for the model.
Not with the modern fluorescent bulbs. These things produce more light then heat. Yes they get warm, but no more then the modelling lamps on my flash heads. Plus they're daylight colour balanced, so no strange colour problems.

Another thing to consider is the size of these modern fluorescent bulbs. They range from big to huge. To give you some idea, have a look at this image.


To give you a guide, the 20w bulb is from my office light and pushes out the equivalent of 100w. The 50w bulb produces the equivalent of 250w and the massive 105w bulb punches out just over 500w of light. Wow!

So, on to the big questions.

Would I still recommend flash over continuous? Yes (see below for exceptions), flash still wins in my opinion. Whilst the new bread of continuous lights are a vast improvement over the hot tungsten lights of my youth, they still have some issues to resolve.

Why did I buy continuous lights? In a word, video. I'm spending more time producing video content for a number of different companies and I need some better lights. So, if like me, you’re thinking about combining video and stills photography continuous lighting make total sense.

Will I be using continuous for still photography? Yes. Despite all I've said there's still one big advantage to continuous lights. What you see is what you get. So for product photography where shutter speed isn't an issue, they're amazingly good. I'm also planning to try them in my next photo session when I want to very shallow depth of field. I’ll let you know the results.

For more details on continuous lights check out http://www.fjwestcott.com/ (North Amarica) or http://www.smick.co.uk/ (UK)

Thursday 26 November 2009

Selective colour inside Adobe Camera RAW

My last 15 minute photo challenge seems to have hit a chord with many people and I'm not totally sure why that is. I think it has something to do with being shot in a typical tourist shopping town, the kind of place so many of us visit on our annual summer holiday and the kind of place most people overlook as being a "photographic" hot spot. It's also created a steady flow of questions, the top three I'll try and answer here:

No 3. Did you get flown out to Sicily just for the photo challenge?
I wish! No, I was on a much deserved family holiday, but for me a holiday isn't a holiday unless I get time to take some photos. Photography is my job, but it's also my hobby.

No 2. Did you REALLY take all those pictures in 15 Minutes?
The whole point of the 15 minute photo challenges is to show that great photos are all around us and equipment, location and available time are not barriers to photography. I really believe it's possible to take great photos anytime, anywhere and I absolutely love putting that theory into practice.

Having said that THIS challenge was so much fun I over ran a little, so technically it show be called "The 20 minute photo challenge". In fact if it wasn't for the lure of a pizzeria, I'd have stayed there all night (or until I ran out of memory cards)

No 1. Yes but you then spent hours working the pictures through Photoshop, right?
Well actually no. I took about 150 photos during the photo challenge, so I got home I picked out the best dozen or so. I then ran them through Adobe Camera RAW giving them all a similar high contrast feel. The whole thing took about an hour.

To demonstrate how this is possible I put together this short video. Enjoy

.


Monday 23 November 2009

Product Photography & bonus video

Regular blog readers will be aware that I produce training videos for a few photographic companies. One of my regular gigs is with http://www.smick.co.uk/ who are a UK based independent distributor of studio equipment.

A few weeks ago I visited their warehouse which is an Aladdin’s cave of studio goodies. The best thing for me was being able to actually see many of the items I have on my wish list at first hand. That's also purpose of making the videos; you get to see the kit being used for real photography.

This week I got my hands on the tabletop lighting kit which is geared towards product photography. The lights are of the “continuous” variety rather then the flash lights I’m more used to. For anyone who remembers the days when continuous lighting meant hot lights, these new low voltage bulbs are amazing. Firstly they're cool to the touch, but they also use far less power. For example the 105w bulbs I was using pumps out 500w of light, which is amazingly bright.

You can see the live action at the end of this post, but because this blog is all about training, here's a bonus video. After you've taken your product photo you may need to extend the background. I that happens here's a quick Photoshop technique which can help.

So here's the live action video. As well as going over the equipment, I also provide a whole bunch of photographic advice on photographing against a white background. The same advice applies to portrait photographers as well as product photographer. Enjoy.


.

Friday 13 November 2009

15 minute photo challenge - Taormina, Sicily

It's been a while since I've added a new 15 minute photo challenge video to the blog, so I'm really pleased to correct that today.

If you've not seen one of these challenges before, here's how it works.

The theory goes something like this. I believe the quality of photographs you take isn't directly related to what camera or lens you own. Sure those are important, but a good photographer can take good photos with any camera you give them, just look at the iPhone gallery by Chase Jarvis to see what I mean.

So in that vain, earlier this year I set myself a personal photography challenge. Go somewhere I've never previously visited, take a "budget" DSLR camera fitted with a cheap 50mm fixed focal length lens and spend just 15 minutes photographing what I see. The results are run through Photoshop where once again I spend as short a time as possible which usually means less then 45 minutes.

In this 15 minute photo challenge I visited at beautiful town of Taormina in Sicily where I walked from one end of the main tourist shopping street to the other stopping only to take photographs.

I hope you enjoybthe results half as much as I enjoyed taking them

.

Friday 6 November 2009

Friday Freebie - Video Loop

Yesterday I posted a video tutorial on what equipment you'll need to produce a professional green screen (chroma key) effect. Both ends of the video featured a short video loop of my own design.

The fact that's it's of my own design is an important point. It's not an ego thing, but a copyright thing.


Whenever you upload a video to the internet, to Youtube or just share it with friends you should always observe copyright. Unless you made it yourself, music, graphics and of course video loops are going to be someone elses copyright. Basically you shouldn't use them without permission (and possibly payment). A hunt around the internet will provide links to royalty free content and that's what I've always used in my videos.

For those of you who want to try your hand at green screen videos, I'm giving away my background video loop. It's 1280x720 resolution, runs for about 40 seconds and it's loopable, which means the begining and the end match perfectly to allow multiple copies to be joined seamlessly.

Here's the link:
http://www.gavtrain.com/samples/circle-loop.zip (17mb)

Usual rules apply. The video is copyright Gavin Hoey 2009. You may use it for personal, non-commercial purposes. Do not redistribute without permission. Most importanly have fun using it.

.

Thursday 5 November 2009

Green screen / Chroma Key

Although I'm known for my Photography / Photoshop tutorials, I'm also a very keen video guy. I'm not talking family videos or mini movies, I'm talking about training videos. So when I was asked by www.smick.co.uk to make a promo video using their excellent continuous lighting and pop up green screen background, I jumped right in.

Using a green screen is fairly easy, but there are some do's and don't. I had to learn these the hard way, but for smick I've managed to sneak in some top green screen tips amongst the product shots.

With the worlds of photography an video set to converge over then next year or two this could very well be something you'll find yourself doing in the not to distant future.


.
.

Friday 23 October 2009

Mirror Box Effect in Photoshop - Week 75

Here's one of my all time favourite 3D effects. I call it the "mirror box". It's a really quick technique to master because it repeats a single techniue to great effect.

There's no need to have the lastest version of Photoshop to try this because the whole thing works using the transform funtions found in all versions of photoshop. Best of all, it works brilliantly with any photo with great results.

Monday 19 October 2009

Make your own world map - tutorial

Ok enough is enough. Because so many of you wanted a copy of the map image I used in last weeks tutorial, I thought I'd upload a copy to the blog. Click the little image to open a bigger one.

Of course having a copy of the image is one thing, but if you really want to learn Photoshop you can't beat making your own map from scratch.


STEP 1:

To make the map you're going to need a non standard photoshop custom shape. A search on Google will throw up a fist full of results but here's a direct link to a free and decent example by lukeroberts over at DeviantART.

STEP 2:

Click on the texture image and open it in Photoshop.


STEP 3:
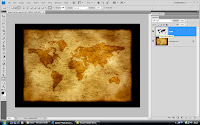
Make a new empty layer and call it MAP. Set your foreground to black. Use the custom shape tool to drag out a map of the world. Hold shift as you drag to keep the map the right shape. Once done change the blend mode to Soft Light.


STEP 4:
Last step. Duplicate the map layer and click Filter - Blur - Gaussian Blur. Use a low setting like 4 pixels jsu to blend the map into the texture.

And that's it.

Friday 16 October 2009

Bonus Video Friday - Two light studio technique.


Long time followers of my videos might recall that sometime back I made a few studio based portrait tutorials. Of late my weekly videos have mostly been about Photoshop and as well as my 15 minute photochallenges (which I really enjoy making). For the record that's not going to change.


But for those of you who are looking for more studio lighting and portrait training videos I have some good news.


http://www.smick.co.uk/ are throwing open the doors of their warehouse and inviting me to make a load of video tutorials using their gear.


Below is one of the first videos which makes use of the Micansu M180 twin flash kit. It's a basic kit aimed sqaurely at home studio works, but it's also pretty capable of producing some quality results. For the price (around £230) you get a decent amount of kit and the build quality is surprisingly impressive too.


The videos will all be on the smick website but I'll post a few of my favourites here over the coming months.

For more details of the kit and more videos go here. http://www.smick.co.uk/sonline/180ws-flash-lighting-kit/prod_391.html

Thursday 15 October 2009

Folded paper effect in Photoshop - Week 74

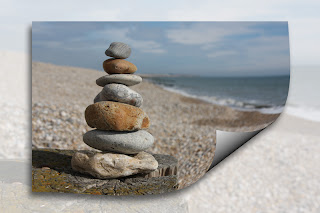
Here a really quick and fun technique. Using only the most basic tools like selections and gradients, it's possible to make almost any image look like it's been folded and then unfolded.

If you like this technique and wish to go further, have a look at the work of Corey Barker over at www.planetphotoshop.com I adapted and simplified some of his ideas to make this tutorial.

Monday 12 October 2009

Totally RAW DVD - It's finally here!

It's been way to long since my last DVD was launched, so I'm thrilled to announced that Totally RAW is finally here.

Here's a link to the info page http://www.gavtrain.com/totally-raw.html

Regualar readers of this blog will know that I'm a passionate advocate of Adobe Camera RAW. Totally RAW is my way of sharing that passion. Below is a two minute clip to give you a tiny flavour of what's on the DVD.


There are 24 videos on the DVD, all recorded in glorious high definition (1280 x 720) and running for the best part of two hours.


If you're new to Adobe Camera RAW (ACR) or current user looking to gain a more in depth understanding of ACR, then you'll love this DVD. I take you through each and every tab and all the major tools, showing exactly what they do and explaining why I use them or avoid them.

Of course photoshop CS4 has several new features compared to Photoshop CS3, the best of which are discusssed in the videos. But CS3 users aren't going to be short changed by the DVD as the vast majority of the features are available in both Photoshop CS3 and CS4.


.

Thursday 8 October 2009

Custom Clouds Brush

Anyone who owns a copy of my Training DVD Beyond the Basics will know that I really enjoy making my own custom paint brushes.


In fact I believe that the Brush tool has been overlooked by many photographers and its potential power has been underplayed by other Photoshop experts. So in an effort to redress the balance this week’s video shows you a quick and simple way of turning a cloud into a custom brush. It's something I've done many times before as you never know when you need to add a small cloud in your photo.

Thursday 1 October 2009

How to create amazing photos with water and a bottle - week72

This week I managed to get some time in the studio and if you're a lover of the Strobist style of flash photography I've got a real treat for in store for you.

The thing that really amazed me about the photos produced during the filming of this video was how simple the set up was compared to the quality of the results it produced. It really is as simple as it looks. Of course, there was a very small amount of Photoshop post processing involved, but less then you think. I'll write a blog post about the technique next week, time permitting.

The key bit of kit for this techniue is the PT-04 wireless off camera flash trigger. I picked mine up from ebay for about £20. It's had a lot of use over the past 12 months and has become a "must have" piece of kit in my camera bag.

Regular viewers of my videos will notice a few improvements this week The biggest thing you will notice is the smart white background made possible by video lighting from www.smick.co.uk

Monday 28 September 2009

Soft edged border - bonus photoshop video.

Amazingly my videos have now been watched over 1.3 million times in 166 countries. That's an amazing statistic. No surprisingly that number of views generates a large volume of emails. Sadly, I don't have the time to answer them all, but I do read EVERY email and message I receive.

Occasionally I'll pick an email request and turn it into a video. So when madaca2813 wanted help to make a blurred edge border for his brothers wedding album I realised I could make a video tutorial quicker then I could type a message.

So exclusively for my blog readers here's a two minute Photoshop quick tip.

Friday 25 September 2009

Friday Freebie

In yesterday's blog video I showed how to make a grunge border using a little bit of paint and a few minutes in Photoshop. If you missed it, here's the link.
http://gavtrain.blogspot.com/2009/09/how-make-painted-grunge-border-with.html
Since the video went live I've recieved a load of requests to upload the orginal borders I painted in the video. So here they are.
CLICK ON THE IMAGE ABOVE TO OPEN BIG IMAGE
Then right click the image and choose "save as"

Usual rules apply. The Action is copyright Gavin Hoey 2009. You may use it for personal, non-commercial purposes. Do not redistribute without permission.

Thursday 24 September 2009

How make a painted grunge border with Photoshop - Week 71

In this weeks video I get the chance to do some painting AND Phototoshop. I can't claim to have any painting skills as such, but for this technique that's probably an advantage.

What I'm creating is commonly called a grunge border. If the grunge style of photography and Photoshop has passed you by, here's a link to one of the many grunge pools from Flickr. http://www.flickr.com/groups/89568081@N00/pool

Tuesday 22 September 2009

Steady video advice for photographers

The last 12 months has seen some of the big digital SLR camera manufacturers head in an interesting, new direction. Along side the usual camera improvements such as more pixels, higher ISO and refined functionality, comes the new “must have” feature. High Definition video capture.

I would guess most serious photographers don’t spend their time making videos except for birthdays, Christmas and perhaps two weeks in the sun every year. But if making a video is as easy as taking a photo, could you resist the temptation to give it a go?

As someone who’s spent a lot of time making photography videos over the past year, I’ve had to learn video skills the hard way. That meant starting with the real basics such as how to keep the camera still.

It’s not a problem in photography, you press the button and freeze the scene, but in video the scene goes on and on and on. Unless you want to make your audience sea sick you’ll need to keep your camera still and your movements steady.

I use one of three techniques.

You already know the value of using a decent tripod when it comes to getting sharp photo’s, so it’s no surprise that a tripod will also deliver steady videos, but for portability a monopod is hard to beat. I use a Hama Star 08 which is perfect for my little camcorder, it’s a bit too flimsy for a DSLR. A more heavy duty monopod shouldn’t be expensive and is a great addition to any photographer’s kit bag.

Next up is a Steadicam. I use the Mini motion cam from Hague. It’s a low tech solution to the problem of smoothing jerky movements such as walking. The whole system relies on small weights at the bottom which counterbalances the camera on the top. It really works, but takes a bit of practice.
The final solution is fairly new to me, but it’s one I hope will greatly improve my videos. To really keep things smooth I’m playing with a piece of video software called Virtualdub and specifically a filter called DeShaker. The filter does exactly what it says. Watch this short clip to see the before and after effect. Amazingly this software is 100% free.


It would appear that the line between a photography and videographer is likely to blur over the next few years. You can choose to ignore it, or embrace it. If you don’t want to get left behind, I’d recommend you consider the later and soon.

Thursday 17 September 2009

Freebie of the week – Page Curl

As you have probably worked out by now, I’m passionate about photography. I’m also passionate about sharing what I know with others. So every week I’m giving away something unique.

This week I’m posting one of my favourite Photoshop actions which gives a quick and effective page curl effect. You’ll need Photoshop CS3 or CS4 to run the action and the effect should look a bit like this.
Usual rules apply. The Action is copyright Gavin Hoey 2009. You may use it for personal, non-commercial purposes. Do not redistribute without permission.

Wednesday 16 September 2009

Photograph and Photoshop a Cross Process effect - Week 70


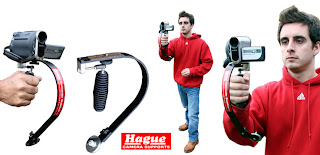
There's a real autumn feel to the weather at the moment. It's feeling a bit colder and there's the ever present chance of rain. The temptation is just to stay inside and put photography on hold until the sun comes out.

I prefer to take the opposite view and use this weather to my advantage. The weather may look grim, but that just means the light is flat and even. Flat light is great for keeping detail in high contrast subjects like the delicate petals of a flower. Rain showers make everything wet and shiny, which makes photography a lot more tricky when the light is bright. Once again low contrast flat light, becomes your best friend and can be used to your advantage in a photo.

It was this thinking that got me into the garden to see what I could photograph. After a quick look around I found a bit of old wood, some leaves and a flower, perfect photography materials.

The plan was to try and make a cross processed style image. The end result wasn't quite the look I orginally envisaged, but I liked it all the same.

Monday 14 September 2009

Why you need to use RAW

Over the next two weeks I hope to put the final touches to my next Photoshop training DVD. The whole DVD is devoted to the subject of processing RAW files in Adobe Camera RAW.

Last week I gave a lecture at a local camera club and part of the evening was devoted to explaining the basics of RAW processing. As with any camera club my audience was made up of mixed abilities, some of the members were really clued up about the advantages of using RAW, whilst others could see nothing but disadvantages in the format.

In this post I’m going try and counter the most commonly voiced concerns I hear about RAW. Before I start I should point out that this isn’t an unbiased appraisal. I believe RAW rules and will try and convince anyone I meet that they should start using RAW today.
OK, let’s tackle the complaints I hear about RAW

RAW files take up too much space.
It’s true RAW files take up 3-5 times more memory then the same Jpeg file. That means a 4 GB memory card will hold around 800 images but that number drops to around 250 when I shoot in RAW. The solution is simple. Buy more memory. Looking at the Picstop store I can buy an 8 GB compact flash card for £14.99 and that includes postage. Now that’s a bargain.


I can’t see RAW thumbnail images in Windows.
This one really stumped me for a while. I could see JPG’s, tiffs and even PSD files in windows but not RAW files. Fortunately Canon, Nikon (and probably others) offer free windows plug in to sort the problem.

Canon: Click Here
Nikon: Click Here
Olympus Click Here

RAW files slow my computer down.
No they don’t, but being bigger means they will take longer to open and they will fill up your hard drive quicker. To get around this you could upgrade to a new computer but it’s much cheaper to buy a bigger hard drive. A 1TB (1000 GB) drive will set you back around £80 for an internal drive or £130 for an external USB hard drive.

Photoshop won’t open my RAW files.
OK I admit this is frustrating. You’ve just bought a flashy new camera but when you try and open the RAW files in Photoshop CS3 they’re not compatible and you’d need to buy CS4 to make them work.

There are two options. First, use the RAW converter that came with your new camera. Second (and probably better) use Adobe’s free DNG converter to batch convert all your RAW files to Adobes RAW format (called DNG). You can download from here www.adobe.com/products/dng


Will I still be able to open RAW files in 10 years time?
It does worry me a bit. RAW files are unique to each camera manufacturer and even unique to each camera model. Who’s to say you’ll be able to find a RAW converter for a Kodak DCS 14n (for example) in 10 years time. My solution is to set my camera to shoot both JPG and RAW simultaneously, that way I have two versions of every image.

RAW work flow is just too slow.
You’re kidding me! If you missed it here’s a short tutorial on using RAW to enhance texture. The last two minutes should convince you that RAW can be the fastest way you’ve ever worked.

So there you go. If you’re never tried RAW, give it a go today. Like everything to do with Photoshop there’s a learning curve, but once you see what RAW can do for your photography you’ll never change back.

Watch out for my “Totally RAW” DVD coming soon.


Thursday 10 September 2009

British Wildlife Centre - Photo Day

Christmas was nine months ago, but that's when this story starts. Last year the christmas present from my wife was the chance to visit the British Wildlife Centre in Surrey and get up close with the animals. If you've not heard of The British Wildlife Centre, here's a link.

For a few days every year the wildlife centre closes it's door to the general public and opens the enclosures to photographers. Living only a few miles from centre, I'd been there before, but getting the chance to go inside the enclosures was a little out of the ordinary.

This was a photography day, not a guided course so there were no rules on the standard of camera to bring. I packed my trusty Canon 40D and a 100-400 IS lens and I felt confident I had the right equipment for the job. My fellow photographers (there were around 20 of us) sported a wide variety of equipment ranging from the professional wildlife gear complete with camoflaged lenses, right down to the happy amatuer with their point and shot digital compacts. Everyone was welcome.

The day started with a visit inside the fox enclosure. With the help of Laura, one of the british Wildlife centres' excellent keepers, the foxes were just a few feet away. No need for expensive lenses here as you can see from this photo. (clicking the images makes them bigger)


After that the group split in two. Half of us went to photograph the scottish wild cats and the other went to find the hedgehogs. After 30 minutes the groups swapped over. Stangely enough the the hedgehog proved to be the most challenging animal to photograph.

The day progressed at a gentle pace. Everyone was given as much time as they needed to take the photographs that they wanted.

As lunch approached we we're given some free time to have a break or move around the centre at our own pace. I decided to try and get some pictures of the red squirrels. These fast moving animals were tricky to photograph and during the free time we were not able to go inside the enclosure. Still, if you're patient and know how to make fences disappear from photos (no, not using Photoshop) then the rewards are there to be had.
By the way, I mentioned that this wasn't the kind of photography day you attend to learn. None the less I'm always happy to share my knowledge, so if you were the gentleman who asked me how to photograph through bars, I hope your pictures came out as well as mine.


The afternoon saw us in the otter enclosure. This was probably the moment I was very pleased with my choice of lens as otters are quite small when they're splashing around in the water.
The day was rounded off by a visit to the badger enclosure and the chance to get close to the owls.

So on to the big questions.

Was the day worth while? For me the answer is yes. I was able to get some great photographs of animals in a natural settings. The keepers were very knowledgeable and accommodating and everyone seemed to be enjoying themselves.


What equipment should I take? A DSLR is the minimum I'd consider and learn how to use the burst mode before you leave home. A lens at least 300mm is required if you want to fill the frame. Finally bring lots and lots of memory cards, you'll be taking many hundreds of photos.

Would I recommend this day to other photographers? Yes as long as they had a fair level of camera skills. If your looking to receive training or guidance you'd be better booking for one of the workshop days run by outside companies. Of course you could always ask me to tag along...

Wednesday 9 September 2009

How to make a 3D film strip - Video Tutorial

A funny thing happened to me recently. I was at a photography workshop with a group of other photographers and as usual everyone was happily snapping away with their cameras. All of a sudden and quite out of the blue, I heard a surprising sound. It's a noise I haven't heard for years and one that bought back so many memories.

So what was the mystery noise? It was the sound of a camera rewinding a roll of film.

And so on to this week’s video. Keeping with the film theme, this week I'm going to show you how to make a film strip from scratch and then give the whole thing a 3D twist.

 (RSS and email readers may need to click on the post title to view the video.)

Tuesday 8 September 2009

Why buy a lens when you can hire?

As your passion for photography grows, so does your desire for more and better equipment. For me it’s not the cameras themselves, but lenses that really set my pulse racing.

My thinking goes something like this. A digital SLR camera body is an amazing machine capable to recording stunning images, but all that technology counts for nothing if you’re using cheap, rubbish lenses. Poor quality glass = poor quality pictures.

Last week I realised I was going to need a Canon 100-400L to get the most of a photo day I’d booked at The British Wildlife Centre in Surrey (more about that later in the week). So I faced three choices

1. Spend £1300 on a lens I’d rarely use after the photo day.
2. Spend £500 on a lower quality lens and moan about its performance.
3. Rent the lens of my dreams.

I’ve always assumed that renting would be expensive and complex, but an advert in the back of Digital Photo magazine caught my eye.

The advert was from a company called Lenses for Hire http://www.lensesforhire.co.uk/ and they promised a simple low cost rental without the need of a big deposit. That sounded exactly what I was looking for and after a few minutes of online form filling, I had arranged the rental of a Canon 100-400L for a cost of £70.00 (3 days rental and return P&P)

So here’s what I received.


The lens arrived by courier and was securely packed in a black rigid case with a combination lock, the code being sent by email. Inside the rigid case is a return address label and a brief instruction manual for the lens.

The lens itself came complete with lens hood (not shown), lens and body cap, plus a Hoya pro UV filter. On the outside the lens looks almost new with only a few signs of use. The glass was spotlessly clean. In fact, my rented lens looked pretty new.

Of course how a lens looks on the outside counts for nothing if the glass and electronics are damaged on the inside. But once again, this lens really delivered the goods. Have a look at these images to see what I mean.

So the big questions.

Would I rent again? 100% yes. The experience has taught me that I can get my hands on pro gear without the expense of ownership.

Would I recommend lensesforyou.co.uk? If you’re in the UK and looking to rent a lens, these guys are great. They provided a quick and efficient online rental service and when I hit a delivery snag, they were at the end of the phone to sort things out.

Will I be buying my own 100-400L? Probably not. It’s a great lens but I wouldn’t get the use from it. Besides I’ve got my eyes on a 70-200 L.

Monday 7 September 2009

Actors, headshots and bonus photos

This week I had the great pleasure of photographing Sam Cassella. He’s a young chap who’s in the middle of his university career where’s he’s studying drama. Sam’s no fools and has realised that to make it as an actor requires experience and one way to achieve that is to become an “extra”.


That’s where I come in. One thing that every aspiring actor or actress needs is a decent head shot for their résumé. By and large these tend to be fairly routine images. From experience I know that a decent head shot has a few key ingredients.
• Be a fair representation of the individual rather then an arty portrait.
• Be black and white (which seems rather odd in these digital days)
• Be taken against a plain background.
In other words something like this…
Ok, lets be honest that wasn’t exactly the most difficult portrait to light and take, in fact any half decent photographer can take a picture like this the hard part is getting the sitter to relax.

So with a decent headshot in the bag of the casting directors, I had plenty of time to take the kind of pictures that I like. When it comes to portraits most of my clients want a pure white background, but for male portraits I tend to shot against a black or great background and use light that has a harder edge.
Sam was an amazingly easy to photograph. He arrived at my studio with a range of clothes from very casual to rather smart. He even bought his “trade mark” hat.


I’ve always had a problem with hats in the studio. Hats with brims cause shadows. Hats with big brims cause big shadows which go right across the eyes and are very difficult to fill. Sam loved his hat and wanted it in the pictures.


After a bit of head scratching and time adjusting the lights, I got some of the best shots of the session.


Tuesday 1 September 2009

15 minute photo challenge - Mount Etna - Week 68


Mount Etna on the Italian island of Sicily provided me with a challenging photo location. It's a stunning location, but getting that to transfer into great photos is no easy matter. It's a trap many of us photographers fall in to. It's so easy to get swept up in the excitment of a new location and all thoughts of basic photographic principles go out the window.

The trick is to keep a sharp look out for the great photos and keep thinking photo thoughts.

Once you think like a photographer you'll find amazing photos will appear in front of you.

To view the finished photos go to http://www.flickr.com/photos/photogavin/sets/72157621881384366

Friday 21 August 2009

How to take infrared photos with a digital camera - Week 67

Infrared Photography is a unique and original to capture amazing black and white images.In this "how to" video, photography expert Gavin Hoey http://www.gavtrain.com goes into the woods to take infrared images using a digital camera fitted with a R72 infrared filter.

Be sure to check out part two when Gavin takes you through the Photoshop side of infrared photography.

How to process infrared digital images in Photoshop- Week 67

Having taken infrared digital images you'll need to process them to extract the best from them.In part two of this infrared tutorial, Photoshop expert Gavin Hoey http://www.gavtrain.com takes you through the essential steps to create a mono masterpiece